Webhooks
Incoming webhooks allows other applications to post the data into CRM when any event takes place in their system. These are special urls or endpoints created to allow easy integration with externals application. Each webhook consists of a unique endpoint, to which external applications can post parameters to create/update/delete data in the CRM.
Note : Having knowledge on how to build REST APIs and VADL is important.
When to use Incoming Webhooks?
- You want to inform CRM about an event occurred in your application and want to log them in CRM.
- For example, when a customer submits his contact data to Google forms. Instead of accessing the excel file to see the list you want to be available in CRM so your sales team can start following up with them.
- You can let CRM know if the customer's bank confirms the payment or customer has raised a charge dispute in your stripe account.
- You want to capture the survey details when the customer submits from Survey to your CRM.
Are these Incoming Webhooks safe?
The data posted using this mechanism follows secure and safe means to connect using a secret token that is provided during the webhook creation. These tokens are unique for each webhook that you create, and can be regenerated at any time to keep them more secure.
To increase the security we have also provided ways to restrict these webhooks from particular IP Addresses only. You can pass one or more IP Addresses to control the access to these webhooks.
How to create Incoming Webhooks?
Webhooks are created using VADL xml nodes, same format is used to create REST APIs as well.
Go to menu, under Platform app select the API Designer tool. Click on Add API button to see 2 options, one to create REST API and other to create Webhooks.
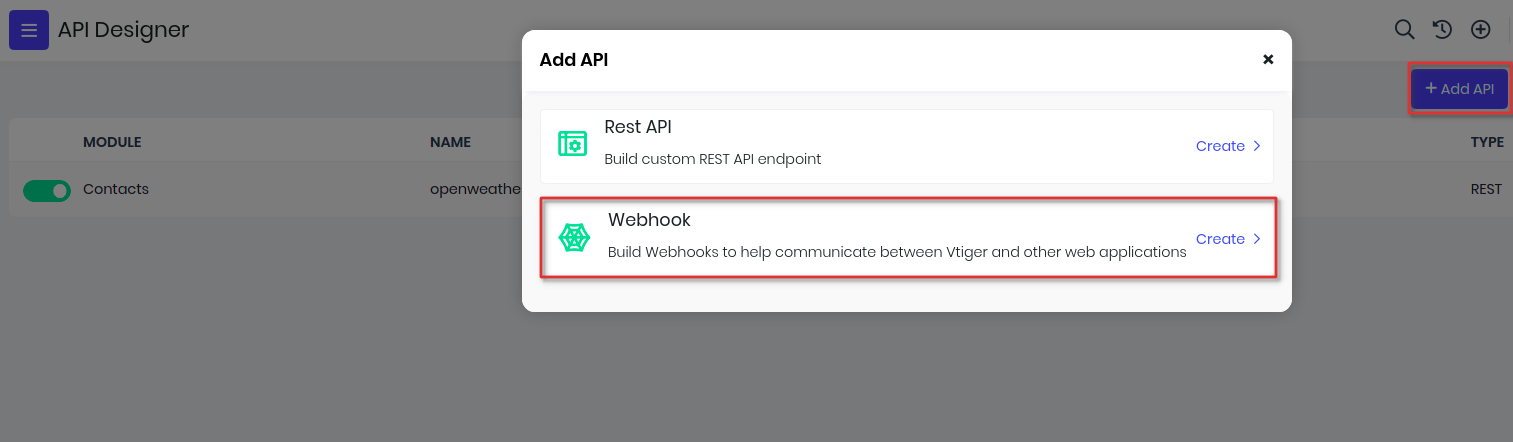
Here are steps to create webhooks.
- Provide a name for the webhook, which will be used to idenfity and access them.
- Select module for which you want to associate this webhook, and enable the status.

- You will see a editor where you need to add VADL definition to define the webhook.
- After defining the webhook, save and publish to make it available for external applications.
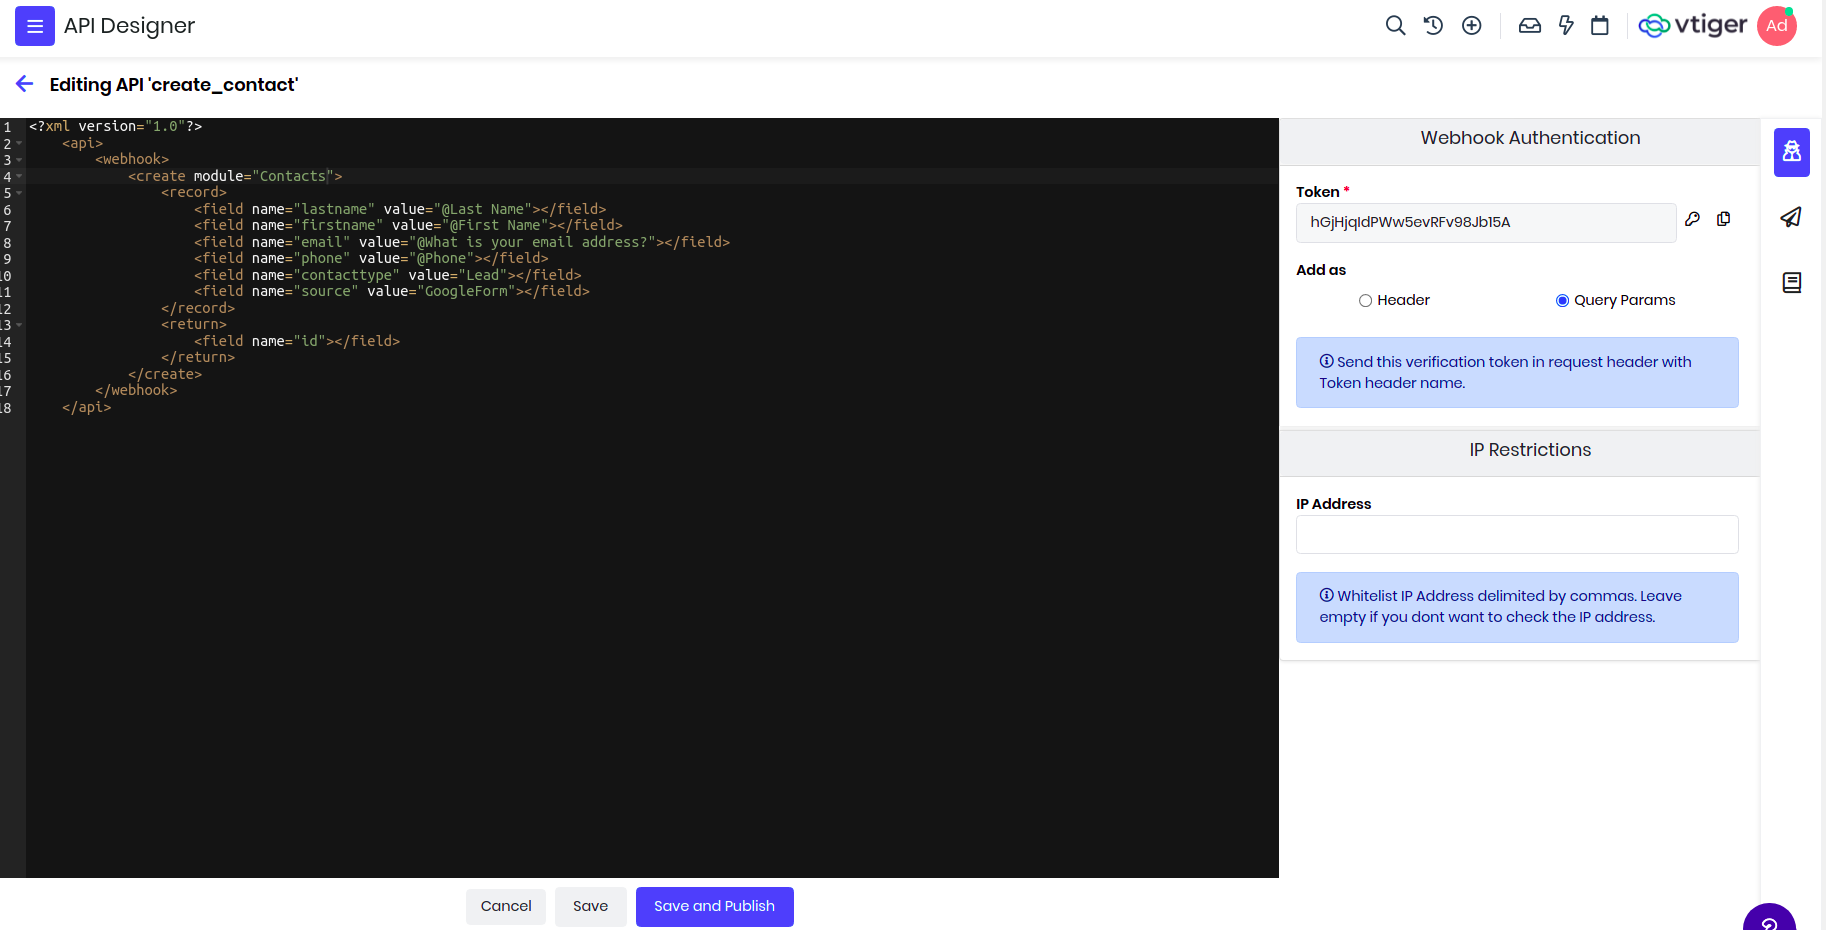
- Before publishing, you will need to create secure token. This token can be created from the Security section.
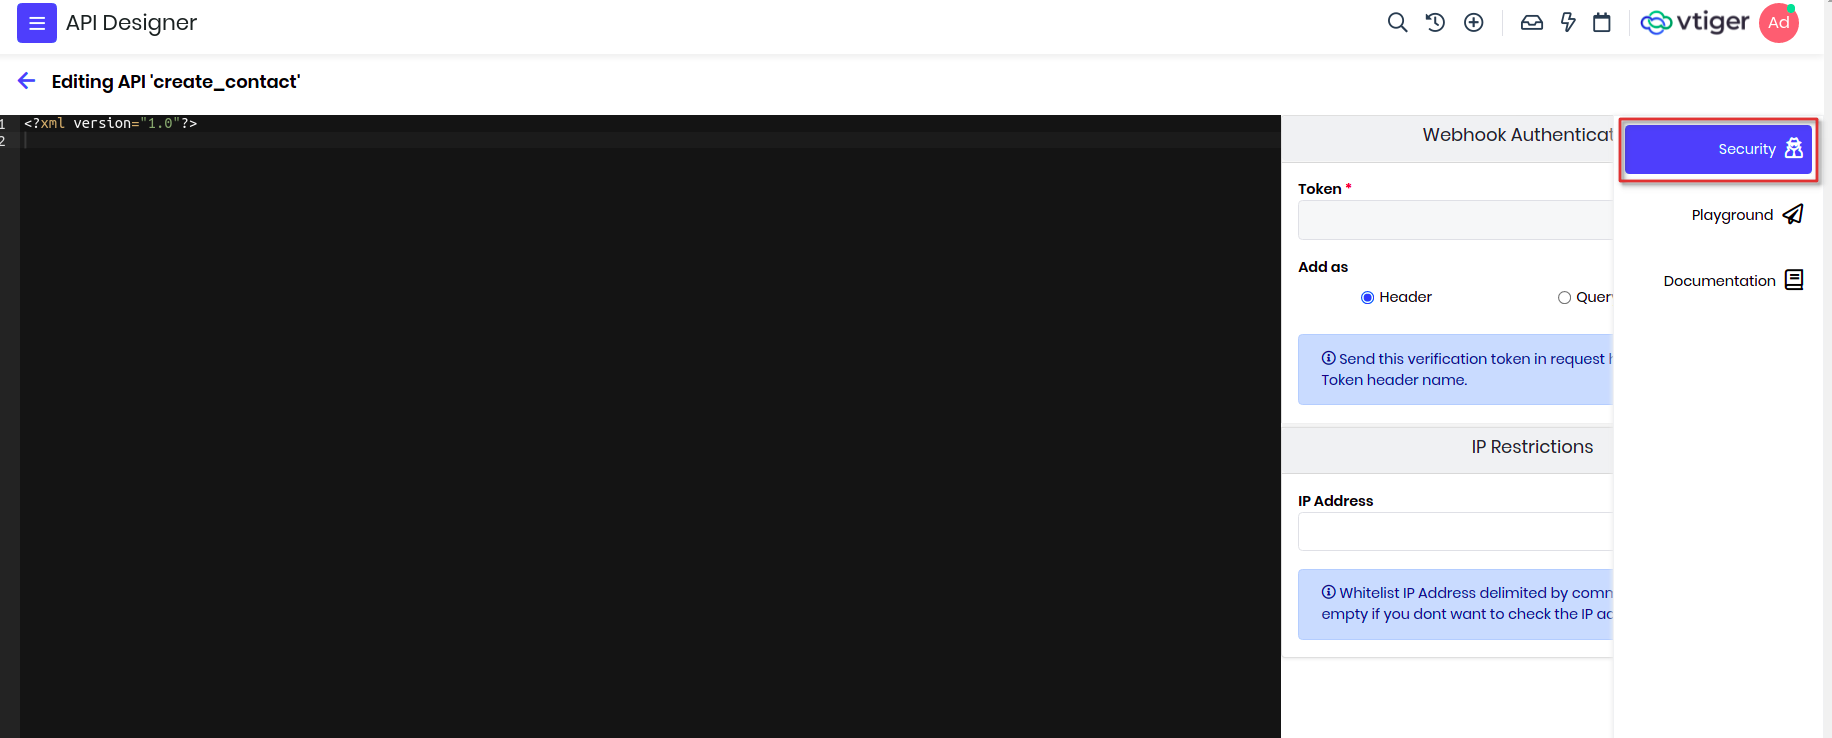
- You can enable this token either to be passed in header or part of the url.
- If needed you can restrict access to the webhook from particular IP Addresses.
Structure of Incoming Webhook
<?xml version="1.0"?>
<api>
    <webhook>
        create or update or upsert records
    </webhook>
</api>
Examples
Integrate with Google forms
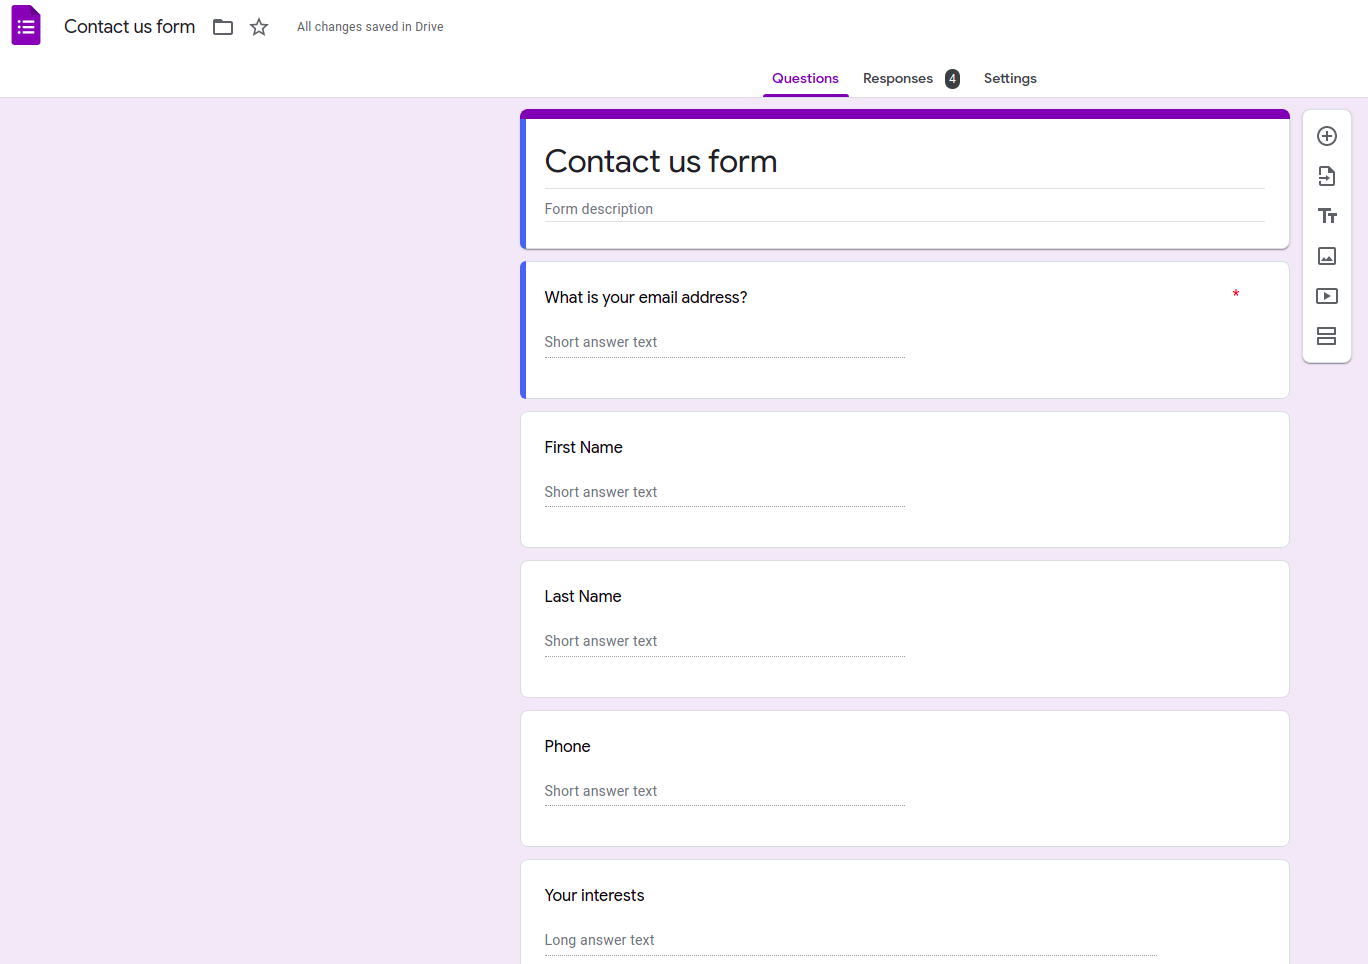
Assume you want to capture the google form data, where customer submits his contact details like phone number, email address and of course his name. We will create each submission as a Lead Contact record in CRM. Lets go through the steps that will help us achieve this integration with CRM.
- Create a Google form to capture Contact details, name, phone and other required information.
- Create a Incoming Webhook request in Vtiger using API Designer.
- Add webhook definition using VADL to create Contact.
- Generate secure token as header or parameter.
- Save and publish the Webhook.
- Enable Google forms to notify Vtiger when form is submitted using app script.
- Copy the webhook endpoint generated in Vtiger to Google forms script to post the data.
Lets go through each of these steps in detail:
First lets create a simple Google form having name, email address and phone number.
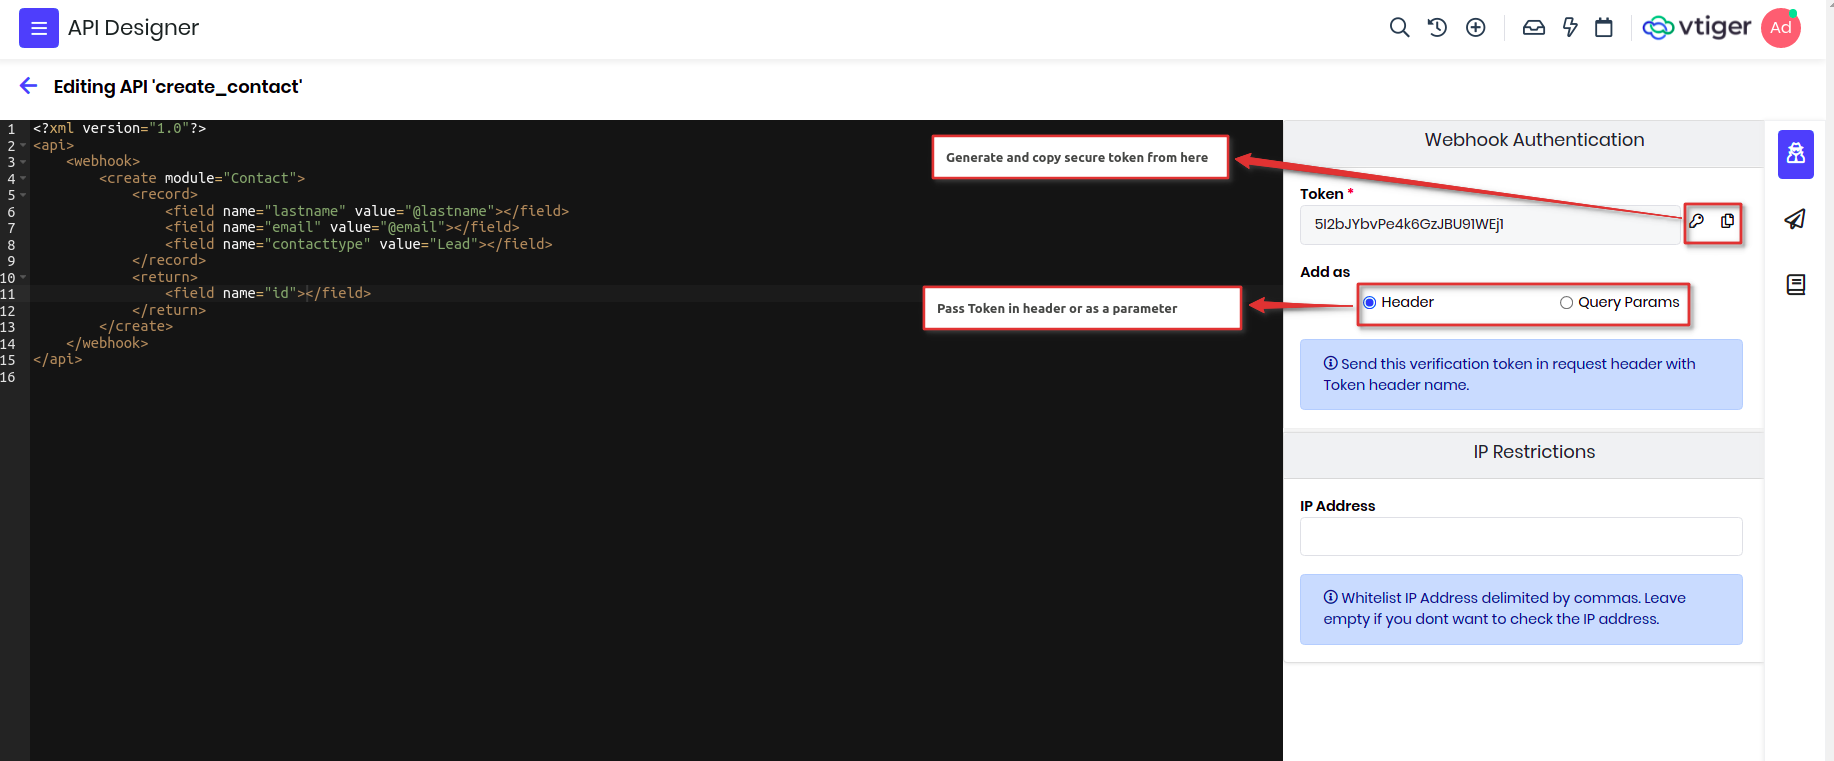
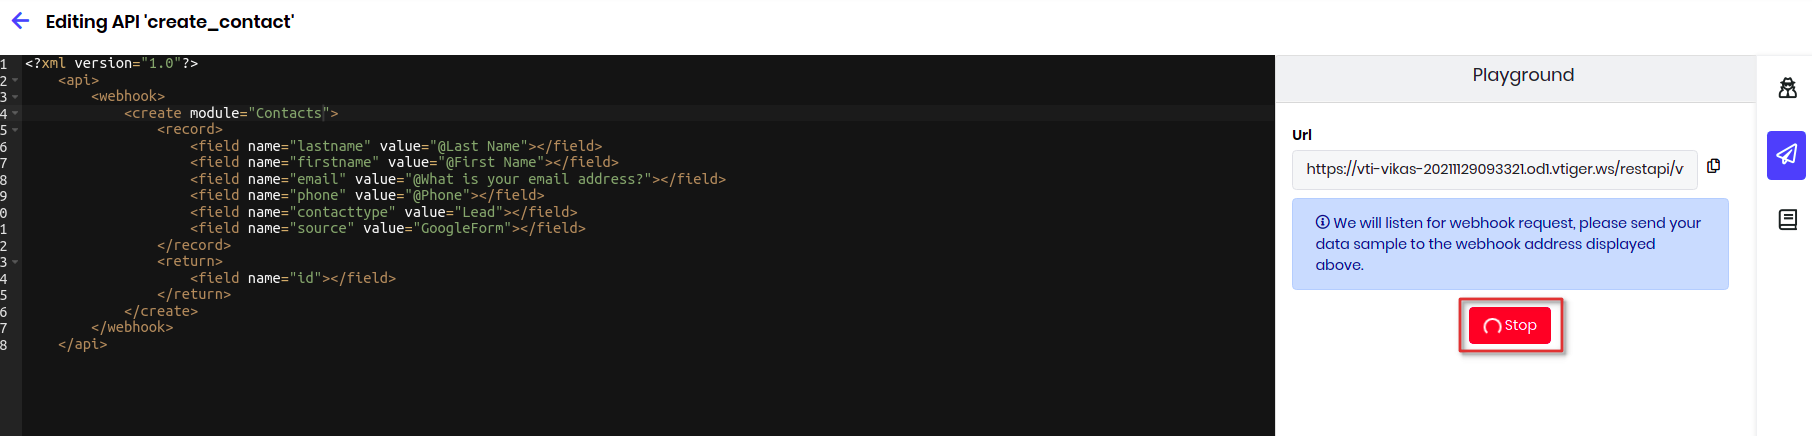
Now lets create webhook from API Designer and add the below definition. We will create a Contact record, map Vtiger fields with google form fields under record.
<?xml version="1.0"?>
<api>
    <webhook>
        <create module="Contacts">
            <record>
                <field name="lastname" value="@lastname"></field>
                <field name="firstname" value="@firstname"></field>
                <field name="email" value="@address"></field>
                <field name="phone" value="@phone"></field>
            </record>
            <return>
                <field name="id"></field>
            </return>
        </create>
    </webhook>
</api>
Let me explain the content of the API below.
| Name | Description |
|---|---|
| api | All the definition are wrapped under this node. |
| webhook | This start the definition of the webhook. |
| Create | This will create a record in vtiger, we need to pass module attribute with the name of the module which needs to be created. |
| record | This is placeholder to define all the fields. |
| field | This defines the field with name attribute and with set the value of the field. If the value starts with @ means the value will be part of request parameters. You can define multiple fields under record. |
| return | This defines what data has to be returned back to the webhook, this is optional and generally not needed for webhook as they are one direction only. |
Before saving and publishing, we need to generate a secure token and decide where to pass it, for now I will select as parameter. It means the token has to be sent as part of webhook endpoint. Once done, it will generate endpoint which you can see under Documentation section on the right panel.
Now lets go back to Google form and configure app script which will be responsible to send the data to this webhook endpoint we generated.
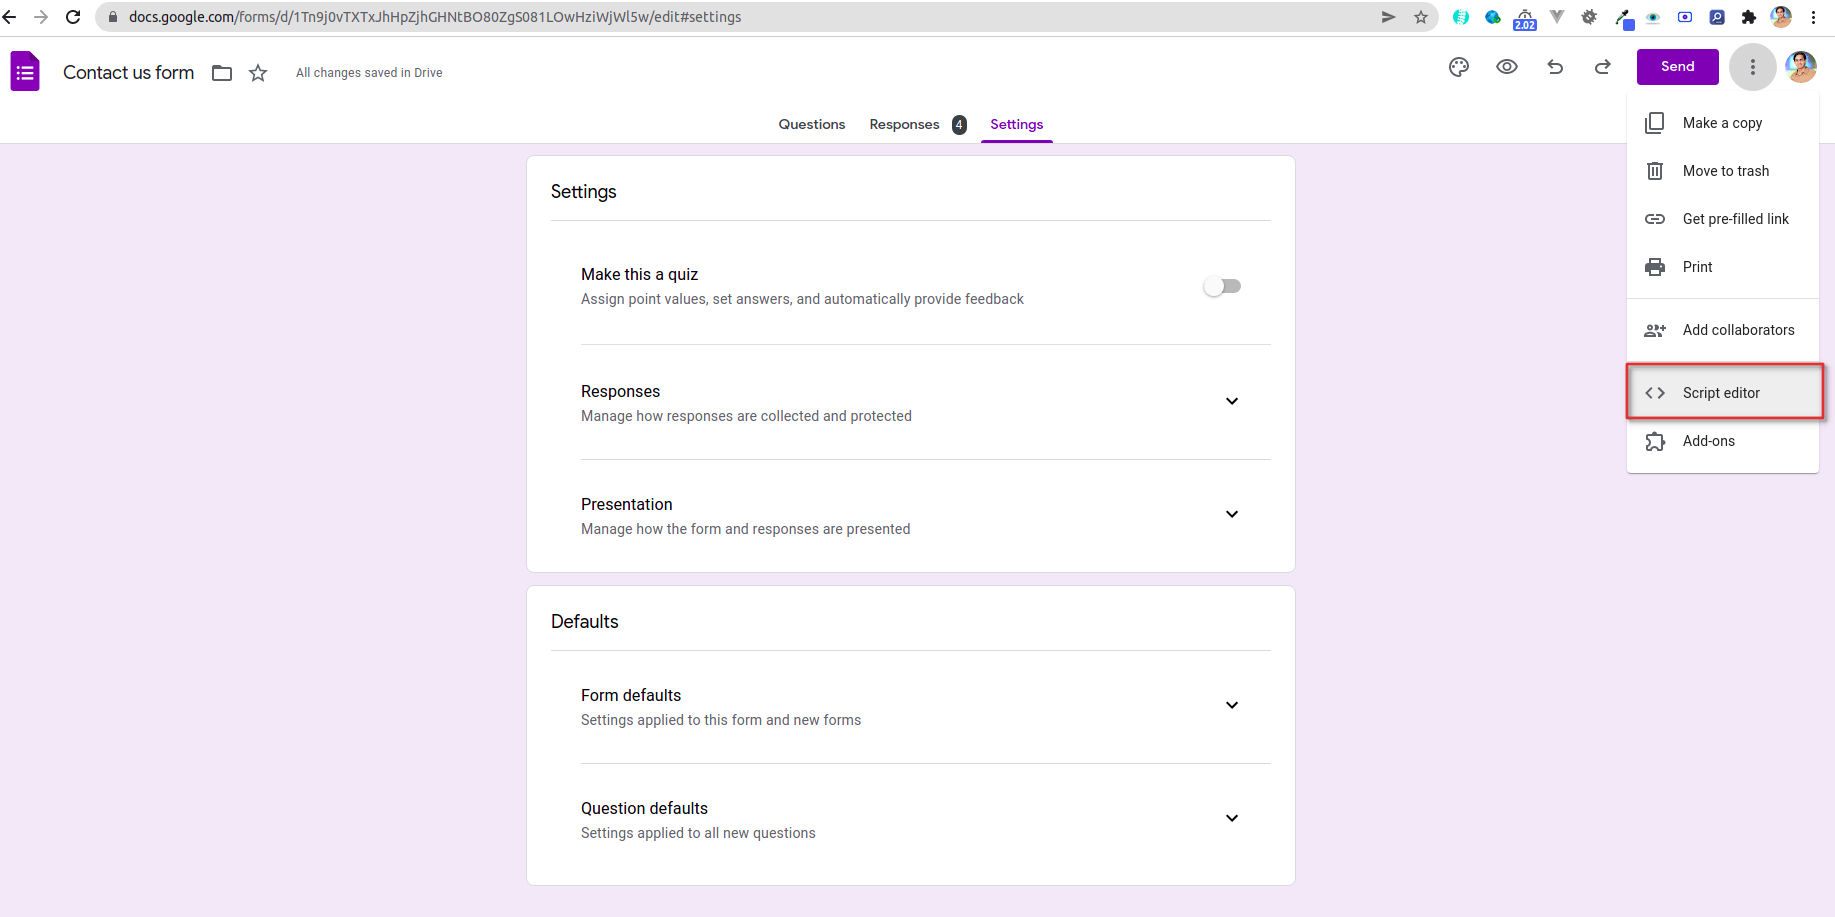
Google form has to now submit data to our end point, this is done by adding a script that will invovke webhook endpoint. You can refer this article for more details on how to deploy and enable form submit triggerer.
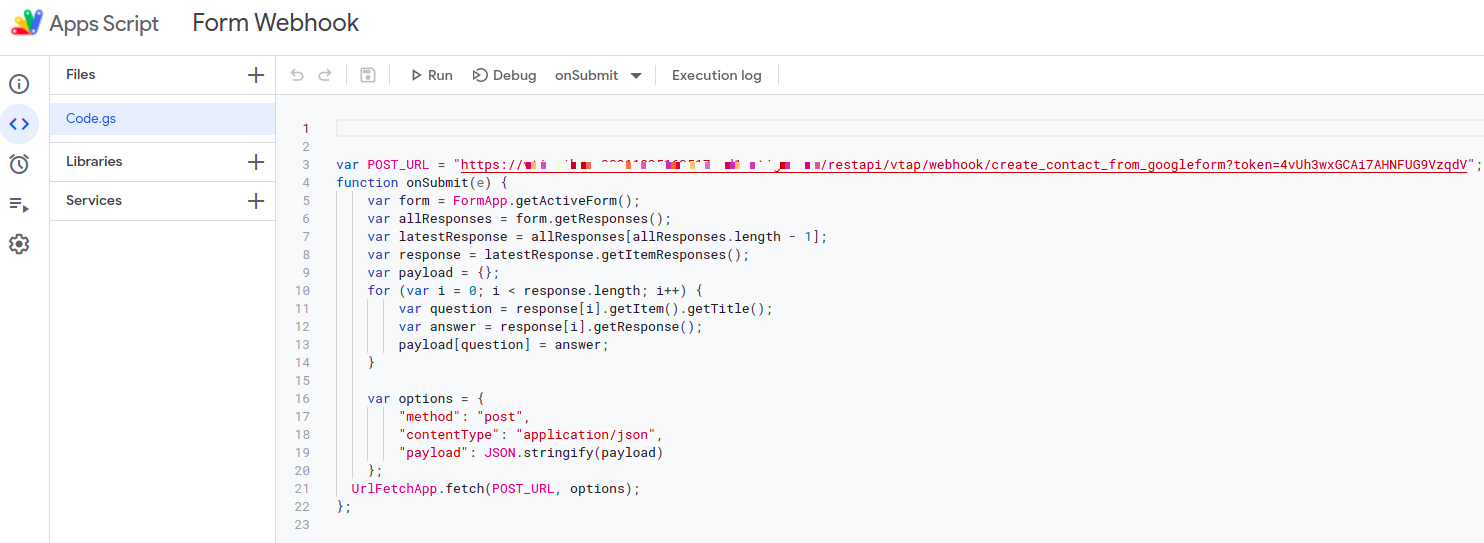
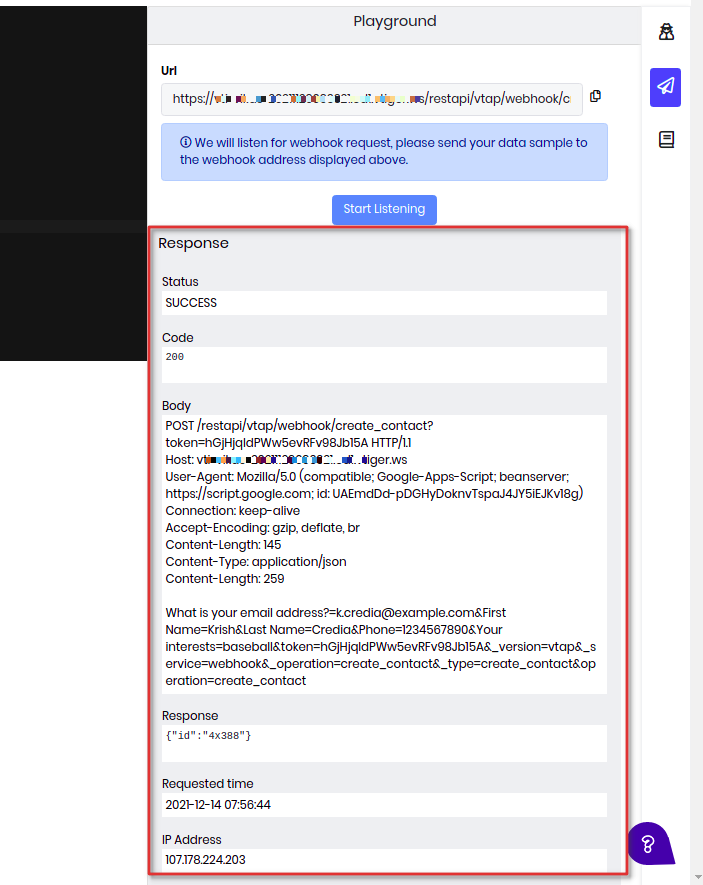
That's it!! you are good to go and test it. Submit one Google form and enable listening in Playground section of the API on the right side panel. We have provided option to see the response of the form submission, IP address of the request, and other details.
You can click on start listening to see the sample response in the logs when form is submitted.

Here is a sample where you can see the response from the google form is captured below. And Vtiger is creating the record, and displaying the response if the api definition.
More webhook examples
Suppose you want to change the stage of a Deal based on some external trigger, like customer paid Invoice which is tracked in other system. In such case you can emit a webhook from that external system using the below api definition.
<?xml version="1.0"?>
<api method="post">
    <webhook>
        <update module="Potentials">
            <record>
                <field name="sales_stage" value="@stage"></field>
            </record>
            <where>
                <field name="contact_id" module="Contacts">
                    <select>
                        <where>
                            <field name="email" value="@email"></field>
                        </where>
                    </select>
                </field>
            </where>
            <return>
                <field name="id"></field>
            </return>
        </update>
    </webhook>
</api>
You have an external system that takes care of electronic signatures, once the customer signs it you want to keep a log of the signed document in the crm. In such case we can create a custom webhook and let external system call it with required details. In the below definition we will create a Document record with the signed document and link to a Contact record using the email address.
Note : You have to send a multipart/form-data request with signed document passed in the filename parameter.
<?xml version="1.0"?>
<api method="post">
    <webhook>
    <create module="Documents">
        <record>
            <field name="notes_title" value="@notes_title"></field>
            <field name="notecontent" value="@notecontent" presence="optional"></field>
            <field name="filelocationtype" value="I"></field>
            <field name="fileversion" value="@fileversion" presence="optional"></field>
            <field name="filestatus" value="1"></field>
            <field name="folderid" value="22x1"></field>
            <field name="document_source" value="Vtiger"></field>
            <field name="document_type" value="Public"></field>
        </record>

        <link label="Documents">
            <select module="Contacts">
                <where>
                    <field name="email" value="@email"></field>
                </where>
            </select>
        </link>

        <return>
            <field name="id"></field>
        </return>
    </create>
    </webhook>
</api>
Details about some of the VADL xml nodes are defined below:
| Name | Description |
|---|---|
| link | This will related the record created with the parent record. Here label attribute is important to identify to which relation will be used. |