ReactJS App
VTAP supports deploying front-end apps built using ReactJS framework. We will cover the changes required to build scripts and deployment using the vtapit tool to make it seamless for your development.
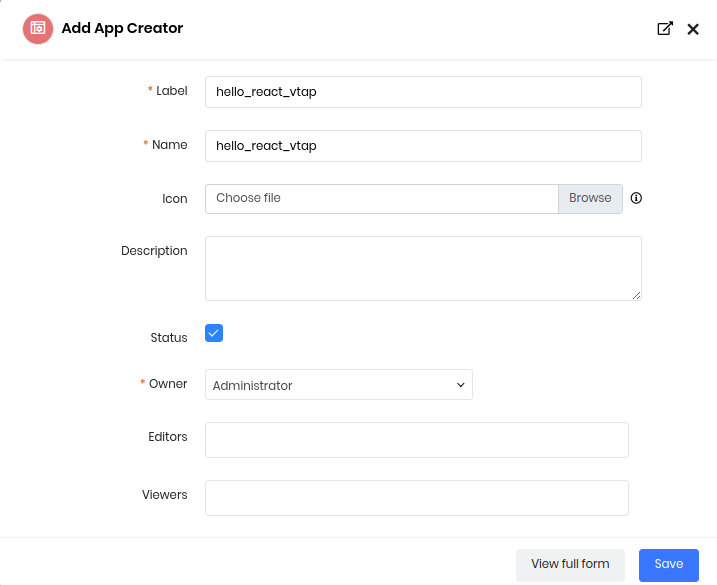
Step 1: Create application (hello_react_vtap). Navigate Main Menu > Platform > App Creator > Add App

Fill the Form And Save
Step 2: Clone application to working directory using vtapit.
vtapit clone --crmapp hello_react_vtap hello_react_vtap_workdir
CRM URL: https://yourinstance.odx.vtiger.com
Username: me@name.here
Password: ********
Step 3: For this example, we will create a ReactJS app within the cloned VTAP working folder. This can be managed in other directory too as it would not be deployed.
cd hello_react_vtap_workdir
npx create-react-app react-src-local
Step 4: Edit react-src-local/package.json
We will customize the default build step to copy the compiled javascript to the VTAP resource folder which will be loaded by the HTML page.
"scripts": {
    "start": "react-scripts start",
    "build": "react-scripts build && cp build/static/js/main*.js ../resources/index.js",
    "test": "react-scripts test",
    "eject": "react-scripts eject"
  },
Step 5: Edit views/index.html
Define the react-app default mount point. Make sure the dependent resources and runtime libraries are loaded.
<!DOCTYPE html>
<html>
    <head>
        <title>React App - Contacts List</title>
        <meta charset="UTF-8">
        <meta name="viewport" content="width=device-width, initial-scale=1.0">
        <link rel="stylesheet" href="resources/index.css">
    </head>
    <body>
        <div id="root"></div>
        <script src="https://cdnjs.cloudflare.com/ajax/libs/jquery/3.7.0/jquery.min.js"></script>
        <script src="resources/vcap.js"> </script>
        <script src="resources/index.js"> </script>
    </body>
</html>
Step 6: You can continue building ReactJS app and build when ready.
Edit react-src-local/src/App.js
import './App.css';
import React, {Component} from 'react';

/* global VCAP */
/* This declaration will avoid eslint errors during build time */

class App extends Component {
  constructor(props) {
      super(props);
      this.state = {
          contacts: []
      }
  }

  componentDidMount() {
    /* We are loading the contacts records here… which gets rendered due to reactivity. */
    VCAP.userapi.records.get({module: "Contacts"}, (e, contacts) => {
        if (!e) this.setState({contacts: contacts});
    });
  }
  render() {
    return (
        <div className="App">
            <ul>
            {this.state.contacts.map((contact, index) => (
                <li>{contact.label}</li>
            ))}
            </ul>
        </div>
    );
  }
}

export default App;
Step 7:
Build ReactJS app - on success it copies the runtime javascript to VTAP app resource folder.
cd react-src-local
npm run build
cd ..
Step 8: You can do a dry-run check of the VTAP app.
vtapit run
http://localhost:8080/myapps/
Step 9:
Deploy final changes to CRM with vtapit push and publish the app to Go-live.
vtapit add views/index.html
vtapit add resources/index.js
vtapit push
vtapit publish
You can launch the app in browser now:
https://yourinstance.odx.vtiger.com/myapps/hello_react_vtap
Congratulations! The ReactJS app is now running on VTAP.